The Analogue Pocket's d-pad is bad, but I made mine work
April 27, 2024•2,207 words
In this post:
- My experience with the d-pad
- How I save time and risk opening up my Pocket, including how to avoid having to detach the infamous display cable
- The solution I used and why it works for me
- And, as usual, plenty of story time
But first!
I’m gonna talk about how I take apart my device here.
If you do that and you break your stuff, you get to keep both pieces.
More clearly: I take absolutely no responsibility for any damages that occur as a result of anything you read here, including but not limited to a broken device or a manufacturer refusing to perform warranty service.
You are on your own.
Why this, of all things?
The Analogue Pocket is many things. "Out of Stock", as it is right now as I write this post, is one of the things it usually is. But it's also a really interesting item in the world of retro handhelds.
We live in an era of so very many options when it comes to emulating the classic games we used to play twenty, thirty, even forty years ago. Many of these take the form of general-purpose processors running some form of Android, which you're then supposed to load up with community emulators and ROM dumps of questionable provenance.
The Pocket is a little different. For starters, it does its work with an FPGA core—a reprogrammable processor that becomes whatever retro system you need. It also comes with a cartridge slot that, out of the box, plays real physical Game Boy and Game Boy Advance games (of which I have many!), as well as supports adapters for a handful of other classic systems.
The way the slot works is distinct from another retro remake system I have—the Atari 2600+—which actually dumps your cartridges on the fly, then plays the dump with community emulators. I don't want to go too deeply into the differences between those approaches in this post, but suffice it to say it works really well, except when it doesn't.
The FPGA approach, in contrast, is for all intents and purposes a real Game Boy—or whatever it is programmed to be at the moment. When it comes to interfacing with the cartridges, it works really well, no matter what the cartridge is doing. It even has a link port that I've used to link to a real GBA and e-Reader to scan Super Mario Advance 4 cards—flawlessly!
The other thing the Pocket does amazingly well is its display. It's got so many more pixels than you think it needs, until you realize that it's using all that extra headroom to not just show the game pixels, but lovingly craft reproductions of how classic LCD screens used to look. It's phenomenal and I can't imagine anyone would want to use the default "bleargh giant square" mode instead of switching over to what these games used to look like on GBAs of yore.
But… there's one thing that doesn't work particularly well. Yeah, it's the d-pad.
The curse of the d-pad
Haunt the Analogue Pocket Reddit and you'll find any number of threads about the d-pad, each sporting any number of opinions about it. My take is that the thing is a blend of meh design and poor quality control.
Now, I am not here to invalidate anyone's experience. I believe that some people have no trouble. I believe that some people experience unresponsiveness. I believe that some people experience unintended button presses.
I have the latter problem. I have an original Game Boy Tetris cartridge, and that's the first thing I slotted into my white Pocket. This version of Tetris predated hard drop, and as such, you would hold the down direction on the d-pad when you're above where you wanna go.
Except when I did that, sometimes the piece wouldn't just go down, but drift to the side a little bit as well.
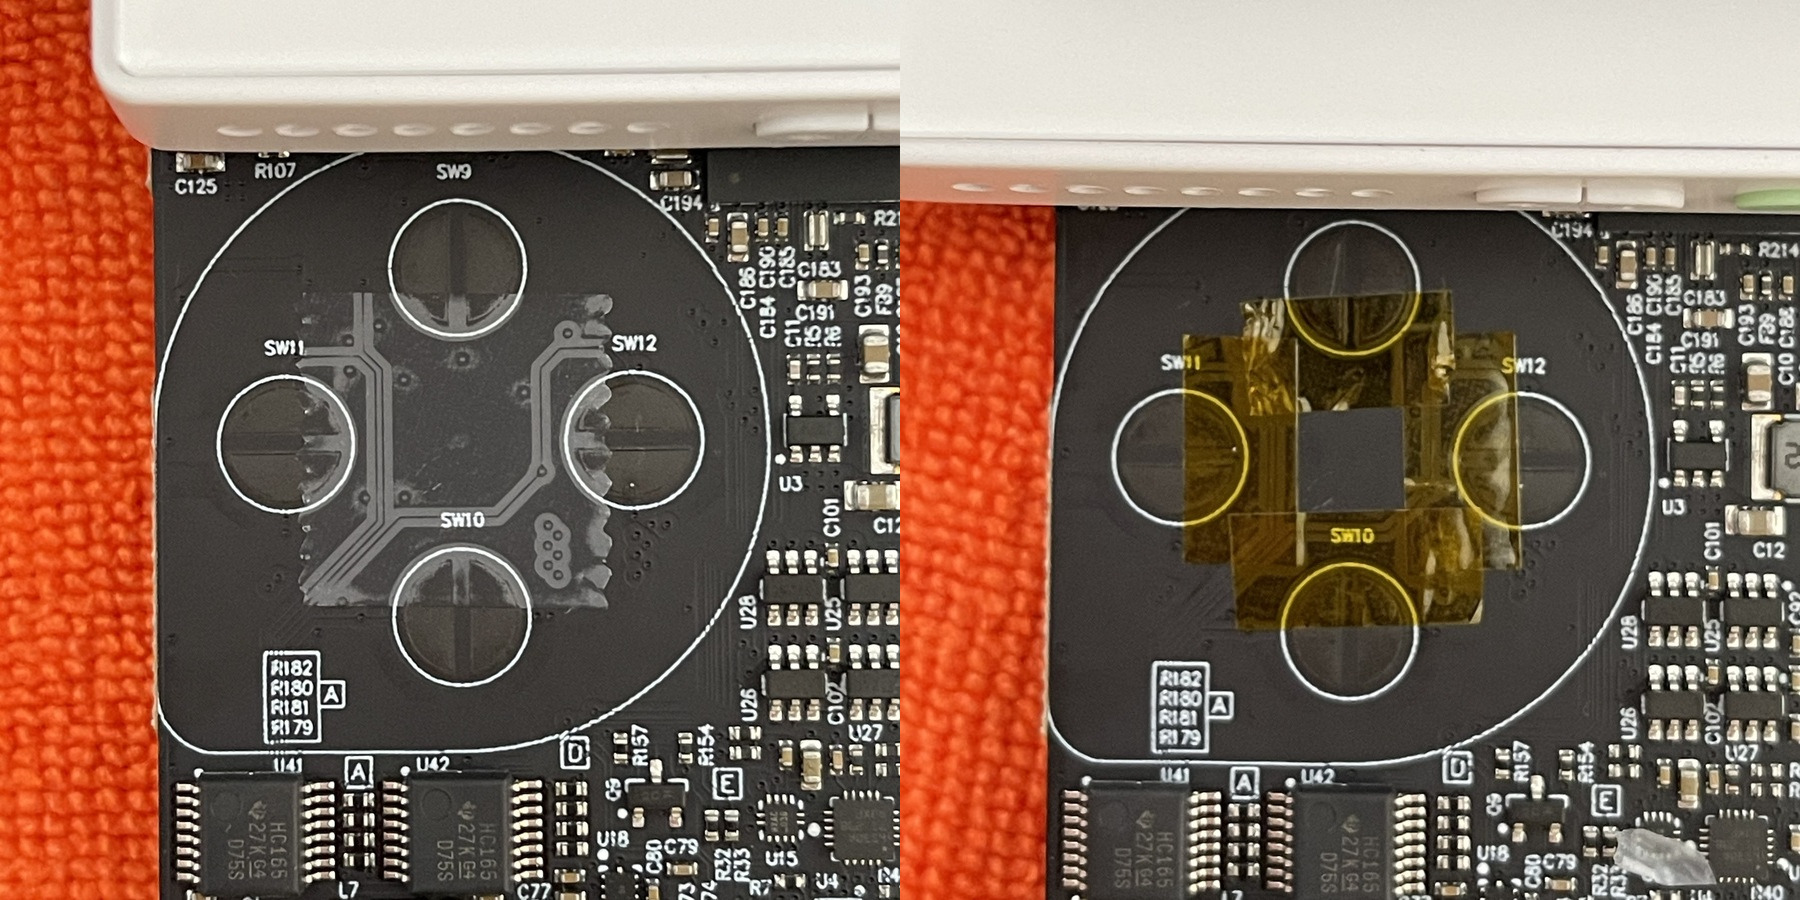
The reason this happened is because, inside this style of d-pad, there's a rubber membrane with conductive areas suspended over the board that will buckle under enough pressure. Those areas bridge contacts on the controller board (or, in the case of the Pocket or other handhelds, the main board itself); the contacts bridging are then treated as input.
Applying pressure to the d-pad in one direction would also apply some pressure to adjacent directions. With enough pressure applied, those adjacent directions—in this case, left or right—would also be bridged and register with the game.
It's actually a good thing for this to happen, to a degree. In some games (often top-down, or fighting games), you want to give diagonal input by rolling your thumb from one direction into another. It's a surprisingly analog thing for a digital control, this idea of how much pressure needs to be applied to the side of one direction in order to make an adjacent direction trigger.
In my case, though, these extra directional presses were happening when I had absolutely zero intent for them to happen at all. Tetris pieces slid to the side, yes, and that was mildly frustrating. But then when Mario was sliding down a hill in SMA4 (holding down on the d-pad), he'd randomly break out of that slide to start running to the side, and take a hit from enemies on the slope. That was when it started to get unacceptable.
Trying to get a fix
So the Pocket isn't even the only controller I have that does this. My Nintendo Switch Pro Controller has been opened up and has a square of Scotch Magic tape in the center of its d-pad contacts, covering up the inner edges, in an attempt to stop Tetris Effect from seeing hard drops when I was just moving pieces left and right.
The tape solution was actually the first one I tried on the Pocket’s board. It works by reducing the possible surface area that the d-pad membrane can make contact with on the board, thus reducing the chances of an accidental contact bridge and input.
It wasn't great, though—by reducing the chances of an accidental bridge, I was also reducing the responsiveness of the d-pad in general. In the interest of both using a better tool for the job and being a bit more surgical, I also tried some well-regarded Kapton tape substitute, which came thinner and allowed me to put the pieces on more precisely. It improved matters, but I still felt like I had to press too hard to keep Mario running.
I tried some other things, as well. Some people have had success with the "donut label" method—putting binder reinforcement stickers over the d-pad contacts. I tried this, and had the same responsiveness problem. I'm guessing this works by adding a little height and requiring a little more force to make the d-pad membrane make contact with the board. I didn't like the feel at all.
I also tried the coding label method. This was the most interesting. It’s based on the theory that the pivot point on the underside of the Pocket's plastic d-pad cap is too short, and thus when you press on the pad, it's too easy to press on the other directions at the same time. To compensate, you build up height on the board under the pivot point with coding label stickers, as well as on the underside of the d-pad cap’s directions.
I did try that method as laid out in the post, using the stock d-pad. The results from my first and second tries were imperfect and I gave up in frustration for a bit at that point.
A better disassembly experience
The frustration I was experiencing wasn't just from the results. It was also because disassembling the Pocket was nerve-wracking. And that was in part because I didn't have a tool I needed. And it's not like the iFixit guide didn't tell me about it…
I cannot emphasize this enough: the Pocket has several teeny tiny ribbon cables, two of which have this bizarre setup I've never seen before where a super, super narrow ribbon terminates in a wider end, and another which needs to be guided in either upside-down or at a very strange angle. I needed angled tweezers for these. Full stop.
The other huge problem I had was dealing with the display cable. iFixit and others recommend you detach it (which is easy enough) and very, very carefully reattach it later (which is infuriatingly awkward and left me holding my breath until I saw the screen power back up, every time.)
The first few times I worked on the Pocket, I tried using my QuadHands, which sort of worked. I was able to grab the top case with one set of hands and the board with the other, and avoid detaching the screen altogether. But it was really awkward working on the d-pad section of the board this way, and I decided to suck it up and risk the display cable.
In my reflection period, though, I discovered a modder doing a button swap. This point in their video was a revelation to me: by just lifting and rotating the board, they had full access to all the membranes and buttons without disconnecting the screen.
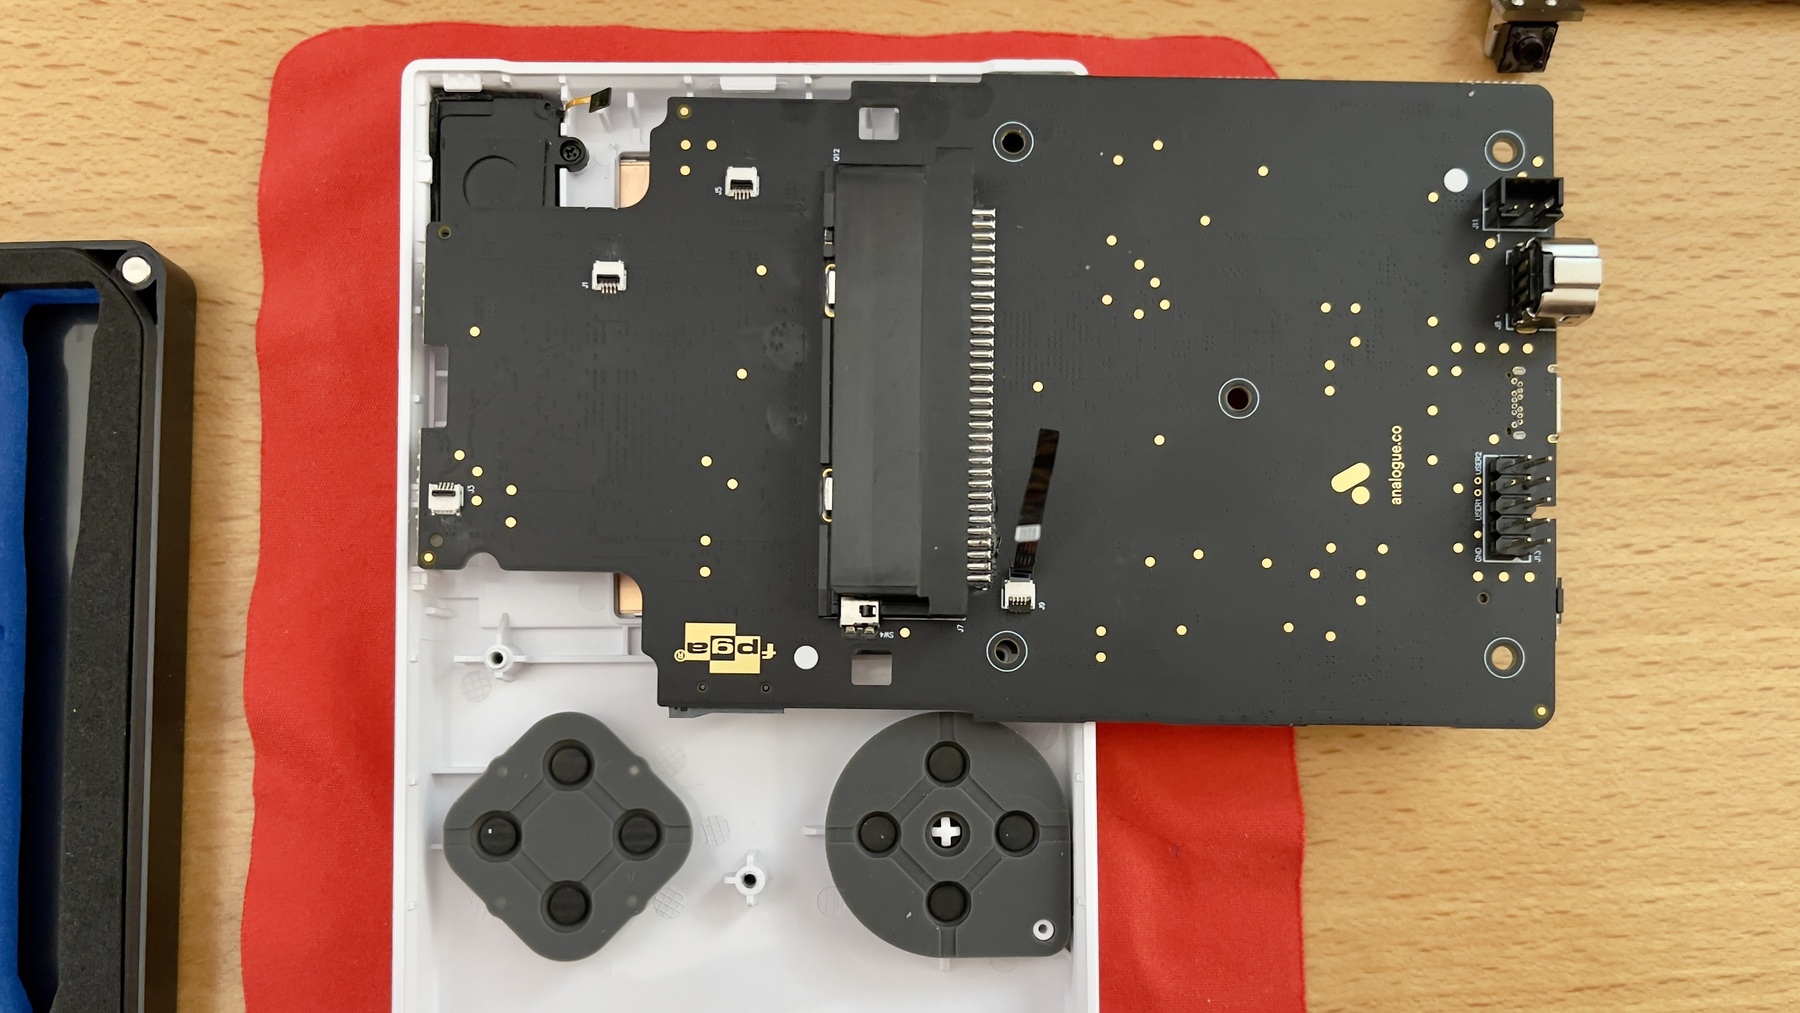
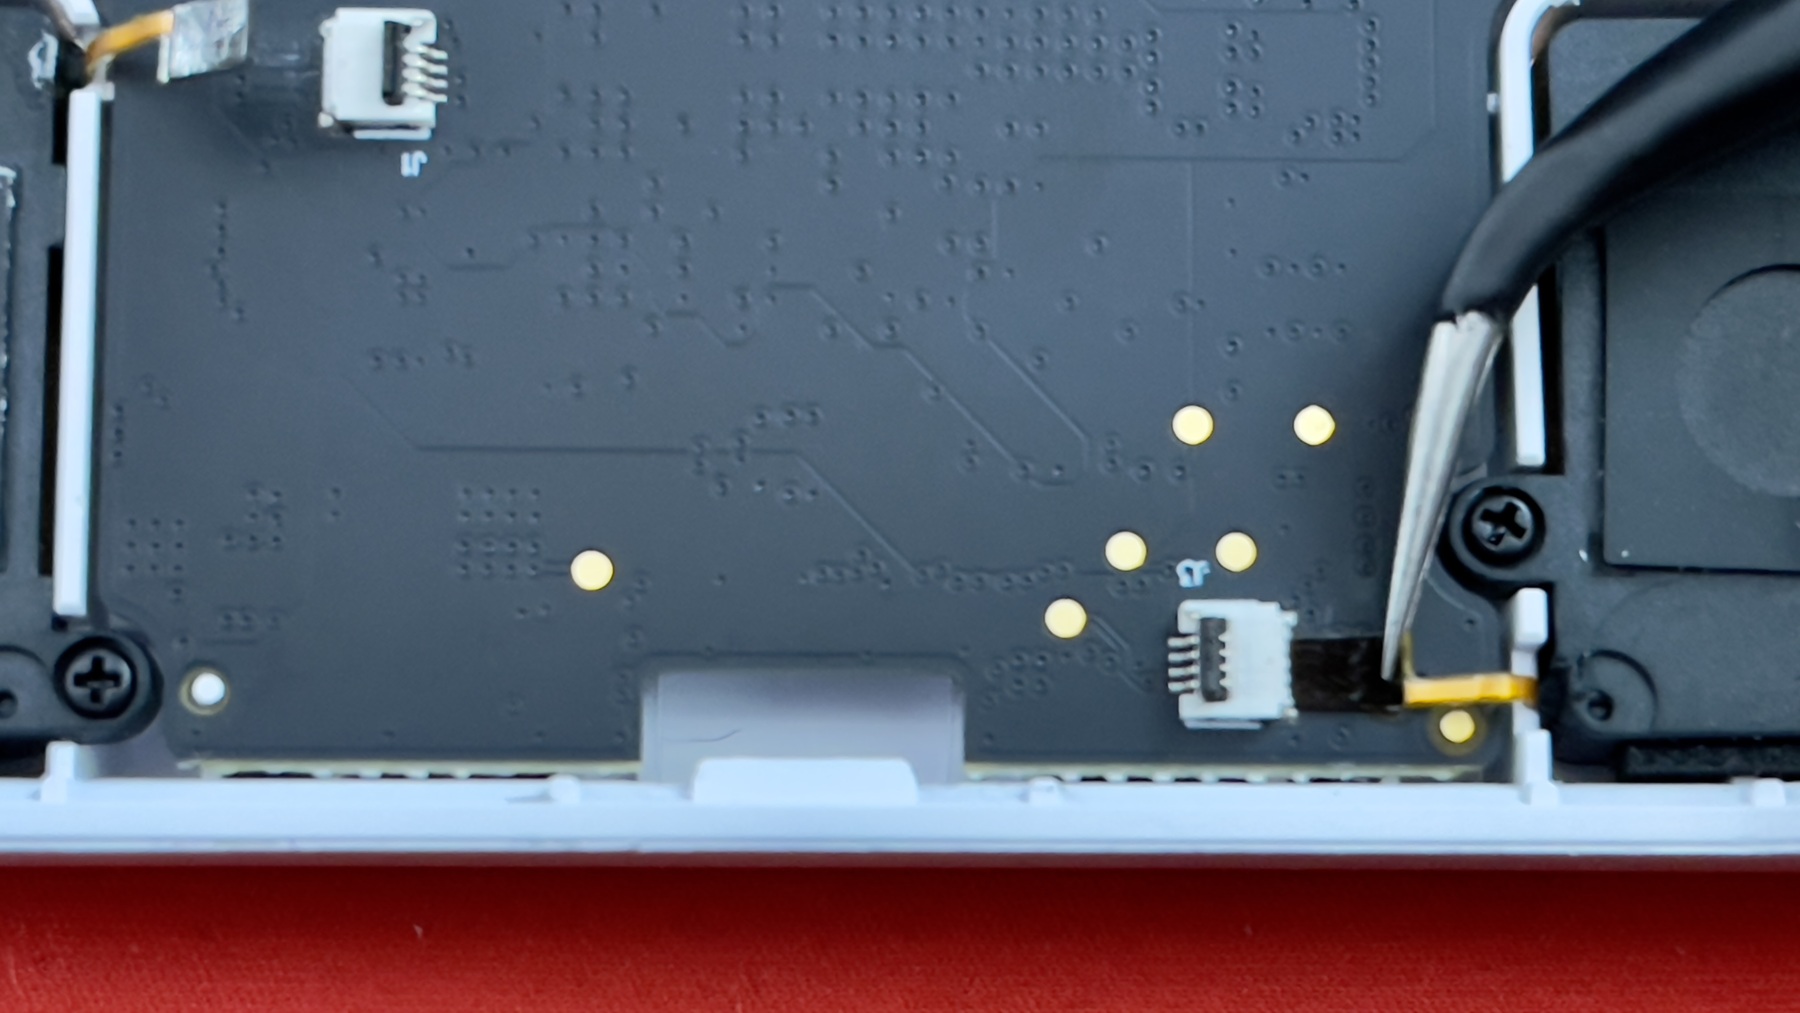
Now, I don't detach the board at all. Once the other ribbon cables are detached and the board screw removed, I carefully lift and rotate the board 90º. The display cable has plenty of slack to flex and make this happen without taking on any stress. Then, I set the whole thing back down, gently, so I have complete access to the contacts on the board.
The other thing I do to speed this all along is that I don't pull the battery off the back half of the Pocket. I do, of course, disconnect it—that's necessary. But once the plug is carefully removed, the whole back will slide off just fine without the battery needing to be pried out.
There was one thing I was always doing right. The coding label method post taught me one really useful thing about the screws: to counterturn them until you feel the thread on the screw "click" into the thread in the plastic case. By doing this, there's no extra stress on the plastic. I learned that if I felt any resistance for the first 80% of turning a screw in, I was probably doing it wrong.
With all this, I'm a lot more confident about getting in and out of the Pocket. Which is good, because I must have done this two dozen times now.
My solution
Confidence restored, I iterated a bit more until I finally arrived at a solution—a variation of the aforementioned coding label method. To get here, I had to prioritize what was important to me.
Thinking about the games I was going to primarily play, I knew that responsiveness for cardinal directions was critical. Avoiding false inputs was a close second.
Responsive diagonals would obviously be ideal, but they were, frankly, a lesser concern. I could be okay with this; I owned a DS Lite and it had the worst diagonal responsiveness I’d ever experienced—plus it had games where it actually mattered.
After critically evaluating all my options, I iterated through a few heights of coding label stacks and landed on just two at the pivot point of the d-pad, with no extra stickers on the directional ends of the pad cap itself.

Those angled tweezers from before, by the way? Super useful again here. Avery’s coding label box has a neat design where you pull on the backing and a sticker pops up without you ever touching it with your fingers. I grabbed the edge with those tweezers and deposited it dead center, then added another.
Firing up bbbbbr‘s amazingly useful button test one last time, I found that I had perfect cardinal responsiveness, incredibly rare false inputs, and pretty good diagonal responsiveness.
I also hit up the SNES 240p Test Suite in openFPGA to check both that I’d wired everything back up correctly (since it could access all buttons, which Game Boy games can’t do) as well as use the shadow tests as a proxy for seeing how well my diagonals would roll. They’re not perfect, but… also, that wasn’t my priority.
I‘m halfway through Super Mario Advance 4 now. All of Mario’s needless deaths have been laid squarely at my feet. Not a one could be blamed on control issues.
I think this has been a success.